
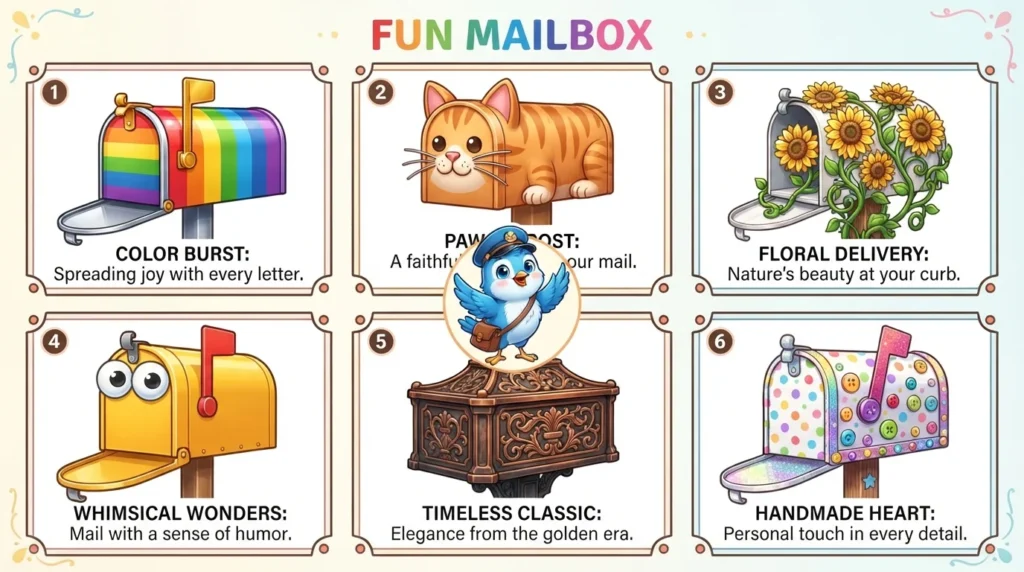
A fun mailbox is a uniquely decorated, customized, or novelty-shaped receptacle designed to receive mail while showcasing your personality, home style, or creative hobbies. From hand-painted floral motifs and animal shapes to retro colors and holiday themes, it turns an ordinary curbside fixture into an eye-catching outdoor art piece.
Have you ever pulled into your driveway after a long day and wished your curb looked just a little more welcoming? Setting up a fun mailbox is one of the easiest ways to bring instant personality and joy to your front lawn.
Instead of settling for a plain black metal box, you can turn your mail catch into a colorful conversation starter for neighbors and postal carriers alike. Installing or decorating a fun mailbox instantly boosts curb appeal while making daily mail retrieval feel like a playful adventure.
Whether you prefer hand-painted flowers, novelty animal shapes, or sleek vintage styles, creating a fun mailbox is simple when you know the right steps. Let’s look at how you can pick, design, and legally install the ultimate mailbox for your home!
Why a Custom Mailbox Boosts Curb Appeal
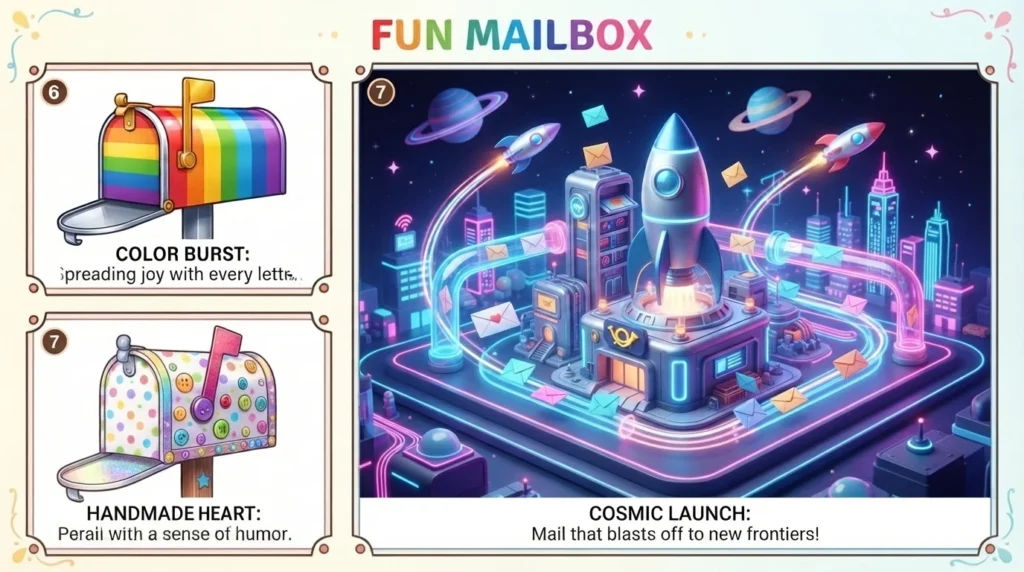
First impressions matter, and your roadside mail receptacle is often the very first thing visitors notice when approaching your property. A standard, faded container signals neglect, whereas a vibrant design communicates warmth, creativity, and pride of ownership.
Transforming this functional utility box into an artistic accent visually ties together your garden, porch decor, and house color scheme. It creates an inviting atmosphere before guests even step out of their cars.
Beyond pleasing your own family, a charming setup brightens the daily route of your local mail carrier. It adds character to the entire street, making your house memorable to friends and delivery drivers alike.
The Psychology of Playful Home Exterior Accents
Small decorative choices around your yard act as subtle mood lifters for everyone who passes by your house. Seeing a playful pop of yellow or a funny novelty sculpture sparks genuine micro-moments of happiness during daily commutes.
Psychologists note that personalizing your immediate environment fosters a stronger sense of belonging and relaxation when returning home. It serves as an outward expression of your family’s unique energy and artistic taste.
Increasing Neighborhood Identity and Warmth
Streetscapes with personalized touches feel safer, friendlier, and more connected than neighborhoods dominated by uniform, bland architecture. A creative curbside setup often inspires nearby neighbors to clean up their own yards and add personal decor.
It creates an easy icebreaker for casual conversations when walking the dog or chatting across the driveway. Simple artistic statements help build a tight-knit community culture over time.
Popular Styles for Creative Mailboxes
Choosing the right theme depends on your home’s architectural style, your personal hobbies, and your overall landscaping aesthetic. You can find options ranging from subtle hand-painted accents to full-scale sculptural novelty designs.
Exploring different style categories helps you narrow down what will look best alongside your porch and front garden. Here are the most popular creative directions homeowners take today.
Novelty and Sculptural Shapes
Novelty containers are shaped like familiar objects, animals, vehicles, or architectural structures rather than traditional metal arches. These designs turn a functional container into a full outdoor sculpture that grabs attention immediately.
- Whimsical animal shapes like manatees, dogs, cows, flamingos, and roosting chickens.
- Vintage transportation models including classic station wagons, tractors, steam locomotives, and airplanes.
- Miniatures of real buildings such as cozy log cabins, lighthouses, Dutch windmills, or mini replicas of your main house.
- Sports-themed designs featuring oversized footballs, baseball gloves, golf balls, or race cars.
Hand-Painted Floral and Nature Motifs
If you prefer classic charm over quirky sculptures, hand-painted artwork offers a timeless, artistic look. You can paint soft wildflower fields, buzzing bumblebees, intricate vines, or ocean waves across a standard box curve.
Using durable outdoor paints ensures your custom artwork survives harsh sun exposure and winter rainstorms. This approach lets you match the colors directly to your seasonal garden blooms.
Retro, Vintage, and Mid-Century Modern Designs
Mid-century modern homes look stunning when paired with bold geometric shapes, brass hardware, and iconic retro color palettes. Bright turquoise, mustard yellow, and fiery orange containers mounted on wooden posts match 1950s architectural lines perfectly.
Vintage cast-iron designs featuring antique eagle crests, intricate filigree, or rustic copper patinas add classic elegance to cottage gardens. These durable metal styles age gracefully over many years of weather exposure.
Official Postal Regulations You Must Follow
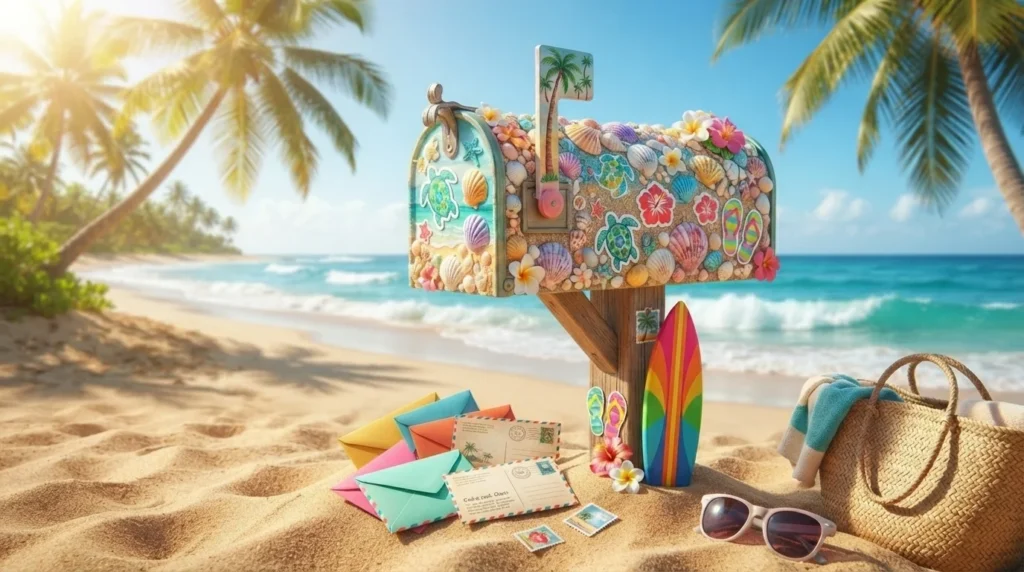
Before you start painting or digging post holes, you must ensure your project complies with official national postal standards. Postal services enforce strict rules regarding height, placement, and door operation to keep carriers safe and mail secure.
Ignoring these guidelines can result in suspended mail delivery until the issue is corrected. Luckily, making a creative design fully compliant is easy when you follow basic setup dimensions.
Proper Height and Distance from the Roadway
Your post must position the container at a comfortable height for a carrier to reach from a vehicle window. The bottom of the box or mail slot must sit between 41 inches and 45 inches above the road surface.
The front door should be set back 6 to 8 inches from the curb edge or road shoulder. This distance prevents passing snowplows and side mirrors from accidentally clipping the unit.
Safe Post Construction and Breakaway Standards
Postal guidelines require roadside posts to yield or bend safely if struck by a motor vehicle. Heavy steel beams, thick concrete pillars, and massive stone structures are strictly prohibited for curbside setups due to safety hazards.
Use standard 4×4 wooden posts or thin steel piping embedded no deeper than 24 inches in the ground. Secure the container firmly to the wooden arm using rust-resistant screws and bracket plates.
Clear House Numbers and Accessibility
Your street number must be clearly visible on the side or door of the container in high-contrast numbers at least 1 inch tall. Clear numbering helps emergency responders, package couriers, and substitute mail carriers locate your home quickly.
Keep the path leading to the door free from overgrown bushes, sharp metal edges, or low-hanging tree branches. The door latch must open smoothly with one hand without sticking or catching.
Comparing Mailbox Material Options

Selecting the right material for your mailbox is the single most important factor in determining how well it withstands harsh weather, resists rust, and keeps your mail dry over time. Different materials offer unique trade-offs between upfront cost, long-term durability, and aesthetic appeal for your home’s exterior. Evaluating the structural strengths and maintenance requirements of popular options helps you invest in a mailbox that looks great and lasts for years.
Heavy-Duty Galvanized Steel and Cast Aluminum
Galvanized steel and cast aluminum represent the gold standard for rust resistance and long-lasting structural durability. Cast aluminum is naturally rust-proof and lightweight, making it an ideal choice for humid or coastal environments where salt air quickly degrades lesser metals. Galvanized steel features a protective zinc coating that guards against impact and corrosion, offering a heavy-duty, highly secure option that handles rough weather and daily wear effortlessly.
Weather-Resistant Molded Plastics and Polyethylene
High-density polyethylene (HDPE) and molded plastics offer a virtually maintenance-free alternative that will never rust, dent, or rot. These durable plastics are often infused with UV inhibitors to prevent bright colors from fading or cracking under intense sunlight. Plastic mailboxes are lightweight, budget-friendly, and exceptionally resilient against minor impacts, making them a practical choice for busy suburban neighborhoods or areas prone to heavy winter snow.
Natural Wood and Decorative Masonry Enclosures
Wood and masonry enclosures provide a classic, highly customizable look that blends seamlessly with natural landscaping and traditional architecture. Cedar, redwood, and stone or brick pillars offer incredible curb appeal and heavy-duty protection against weather and vandalism. However, wood structures require periodic staining or sealing to prevent moisture damage and wood rot, while masonry installations require a larger budget and permanent groundwork.
Step-by-Step DIY Guide to Painting a Custom Mailbox
Designing your own custom painted container is an enjoyable weekend project that yields incredible visual rewards. You do not need professional artistic training to achieve a clean, long-lasting finish on metal or plastic surfaces.
Proper surface preparation is the real secret to preventing paint flaking, rust spots, and sun fading over time. Follow these simple steps to complete your custom paint project like a pro.
Step 1: Remove the Box and Clean the Surface Thoroughly
Unbolt the unit from its mounting post so you can work comfortably on a workbench or flat outdoor table. Wash off all accumulated dirt, road grime, spiderwebs, and oil spots using warm water and dish soap.
Rinse the container completely with fresh water and allow it to dry fully in the sun. Remove any peeling old paint or rust spots using medium-grit sandpaper or a wire brush.
Step 2: Apply Sanding and Exterior Primer
Lightly scuff the entire outer surface with fine-grit sandpaper to help the new paint grip the material securely. Wipe away all fine dust particles with a clean microfiber cloth or tack rag.
Spray a thin, even coat of high-quality outdoor metal or plastic primer across the exterior surface. Let the primer dry completely for at least two hours before applying your base color.
Step 3: Paint Base Colors and Detailed Designs
Apply two thin coats of outdoor rust-inhibiting spray paint or acrylic enamel as your primary background color. Allow the base layer to cure completely before adding detailed freehand art, stencils, or geometric stripes.
Use outdoor acrylic paints and small detail brushes to add flowers, house numbers, or fun patterns. Take your time working in thin layers to avoid accidental paint runs along vertical sides.
Step 4: Seal with a UV-Resistant Clear Coat
Protect your hard work from sun bleaching and heavy rain by applying a durable clear sealer layer. Choose an outdoor UV-resistant clear gloss or satin spray coat designed for harsh outdoor weather.
Apply two thin clear coats over the finished paint, allowing 20 minutes of dry time between coats. Reattach the unit to your post once the final coat cures fully after 24 hours.
Creative Ways to Decorate Around Your Post

Upgrading the container itself is only half the fun; dressing up the surrounding ground area creates a complete garden feature. Adding flowering plants, decorative stone borders, and subtle lighting turns a bare post into a lush landscape focal point.
Integrating live greenery softens hard metal lines and makes your entryway feel warm and natural. Here are easy ways to decorate around your post base.
Building a Mini Raised Flower Bed
Constructing a small stone or timber border around the post base creates a tidy, dedicated planting zone. Fill the enclosed ring with nutrient-rich topsoil and compost to support healthy plant growth.
Select low-growing, hardy perennials that can handle heat reflected from hot asphalt roads. Marigolds, petunias, creeping thyme, and colorful succulents thrive in sun-drenched roadside conditions.
Planting Climbing Vines and Creepers
Training non-invasive climbing vines to wrap around a wooden post adds instant fairytale charm to your front lawn. Vines soften sharp wooden edges and provide seasonal green foliage throughout the warmer months.
- Clematis featuring large, purple or pink summer blossoms.
- Climbing nasturtiums with bright edible flowers and rounded dollar-shaped leaves.
- Star jasmine offering deep green foliage and sweet-smelling white spring blooms.
- Miniature ivy varieties that provide year-round green coverage in shady zones.
Adding Solar Lighting and Decorative Accents
Installing small solar-powered LED lights near your post illuminates your house numbers clearly after dark. You can place solar garden stakes around the flower border or attach a small solar cap to the wooden post top.
Hang a small brass wind chime or a miniature wooden birdhouse from the crossarm for extra charm. These tiny details bring delightful movement and gentle sound to your front yard.
MCQs
Test your knowledge of mailbox regulations, DIY paint steps, materials, and landscaping techniques with these ten multiple-choice questions!
- What is the official required height range from the road surface to the bottom of a curbside mailbox door?
A. 12 to 18 inches
B. 25 to 30 inches
C. 41 to 45 inches
D. 60 to 70 inches - How far back from the curb edge should the front door of a mail receptacle be positioned?
A. Flush with the exact road edge
B. 6 to 8 inches back
C. 3 feet back into the lawn
D. 10 feet away from the street - Why are thick concrete pillars and heavy steel girders prohibited for roadside post construction?
A. Concrete absorbs too much moisture from rain
B. They present severe safety hazards to motorists during vehicle collisions
C. Steel posts are illegal to buy at hardware stores
D. Postal workers refuse to touch concrete surfaces - What crucial step prevents outdoor paint from flaking off a metal container after a few months?
A. Washing the surface with motor oil
B. Lightly sanding the surface and applying an outdoor primer
C. Wrapping the box in tight plastic wrap while wet
D. Painting only during freezing winter temperatures - What minimum height must house numbers on a roadside box be to ensure clear visibility?
A. At least 1 inch tall
B. Exactly 10 inches tall
C. One millimeter tall
D. Numbers are strictly forbidden on boxes - Which material provides maximum resistance against rust without requiring heavy rust-inhibiting sealers?
A. Untreated raw iron
B. Thin cardboard
C. Cast aluminum or heavy plastic
D. Untreated plywood sheets - Why is applying a UV-resistant clear coat essential at the end of a DIY painting project?
A. It makes the metal container completely flexible
B. It protects the painted artwork from sun fading and moisture damage
C. It increases the overall mail capacity inside
D. It automatically opens the door when the carrier arrives
Answer Key
- C
- B
- B
- B
- A
- C
- B
Frequently Asked Questions (FAQs)
Do I need permission from my postmaster to install a custom mailbox?
You do not need formal written permission for standard designs, provided your setup strictly follows official height, setback, and safety rules. However, if you are installing a custom novelty shape or changing the box location, consulting your local postmaster first is recommended.
How can I stop outdoor paint from peeling off my plastic mailbox?
To prevent peeling on plastic, sand the surface scuff-smooth and clean off all dust thoroughly before applying paint. Always use a specialty primer designed specifically to bond with synthetic plastics, followed by durable outdoor acrylic topcoats and a clear sealer.
Are lockable mailboxes allowed to be decorated or painted?
Yes, you can paint or decorate lockable mailboxes as long as the delivery slot remains completely unobstructed for carrier access. Ensure paint does not gum up keyholes, hinges, or incoming mail flaps, and keep house numbers clearly visible on the exterior.
How do I protect my decorated post from weed wacker damage?
Protect your wooden post base by installing a plastic trim guard or placing a ring of decorative river stones around the bottom. Creating a stone border keeps string trimmers at a safe distance, preventing bark gouges, chipped paint, and wood rot.
What should I do if my local Homeowners Association has strict decor rules?
Review your community architectural guidelines before purchasing or painting a new container to verify allowed colors, sizes, and mounting styles. Many HOAs permit subtle hand-painted accents, classic wood finishes, or high-end retro metal designs even if novelty shapes are restricted.
How can I make my custom mailbox winter-ready?
Prepare for winter by checking that mounting screws are tight, applying a fresh clear sealer coat over paint, and oiling door hinges. Ensure snow shoveled from driveways is cleared away from the front door so your carrier has unimpeded vehicle access.
Conclusion
Upgrading to a fun mailbox is one of the most fulfilling, quick outdoor improvements you can undertake for your home. Combining playful design with practical function transforms a simple roadside fixture into a joyful reflection of your family’s creative spirit.
By respecting official postal height rules, choosing durable outdoor materials, and applying proper paint coats, your custom creation will stand up to harsh weather for years. Pairing your new container with lush base plantings creates a complete landscape feature that brightens your entire street.
Gather your paints, pick out a favorite theme, and start building your ultimate curbside statement piece today!

Asjad Ali is a passionate, fun, and entertainment enthusiast who enjoys discovering interesting, amusing, and engaging content from around the web. Through laughvista.com, Asjad shares lighthearted ideas, entertaining stories, fun facts, jokes, and enjoyable content designed to bring a little more laughter and positivity into everyday life. His goal is to create content that feels natural, relatable, and easy for everyone to enjoy.
With a genuine interest in fun and entertainment, Asjad Ali focuses on creating friendly content for readers of different ages and backgrounds. laughvista.com is built around the idea that a few moments of laughter can brighten anyone’s day. Whether readers are looking for something funny, interesting, or simply entertaining, Asjad aims to make every visit enjoyable, refreshing, and worth coming back to.